YouTube link : Kintsugi Mugi/Nori Urushi, Urushi Glue
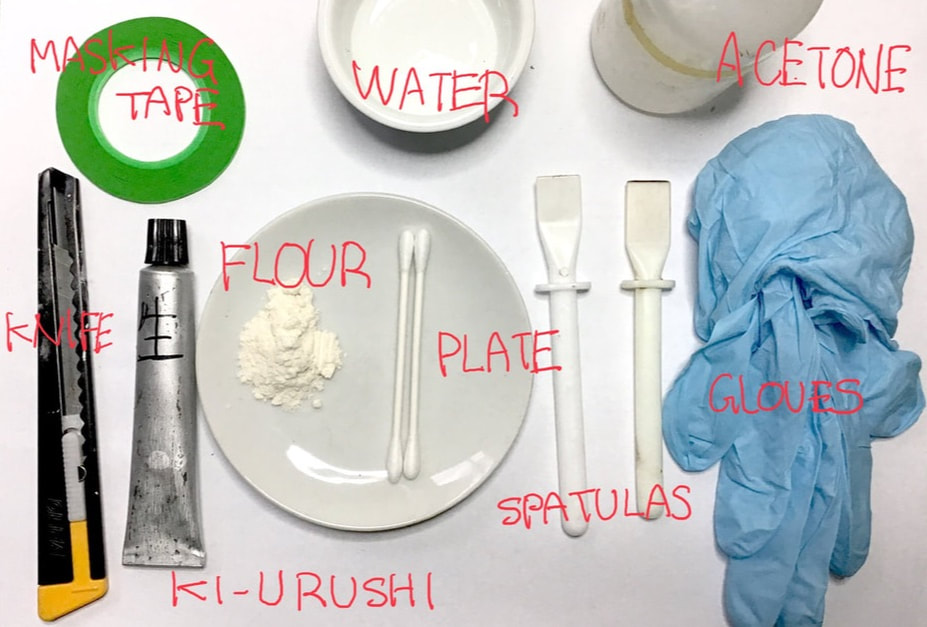
You need
Ki-urushi,
A dash of water, (if you have rice grue, much better)
Plain flour (can be strong flour), (if you have rice powder, much better)
Acetone
Tools
Disposable gloves,
A white plate, or glass work surface.
Cotton swab, 2 spatulas,
Cutting knife,
Masking tape. (2 to 5 mm width),
Box to keep your plate safe.
Preparation:
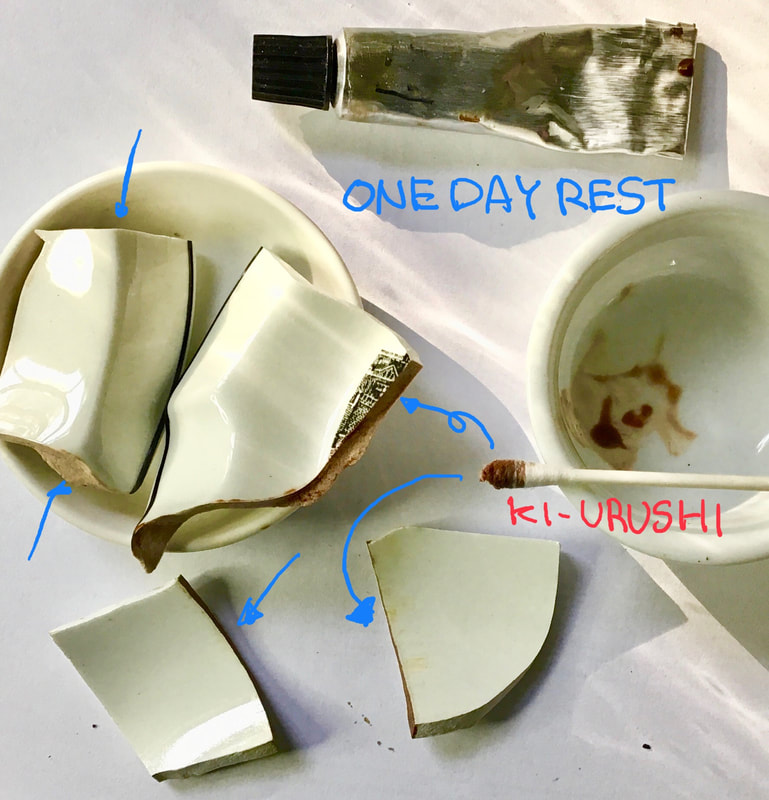
When you use urushi, always wear disposable gloves.
Apply diluted Ki-urushi with gum turps (50:50), using cotton swab or brush on broken sections. Then place in Box. (Keep for a day in a box if you have time.)
When you use urushi, always wear disposable gloves.
Apply diluted Ki-urushi with gum turps (50:50), using cotton swab or brush on broken sections. Then place in Box. (Keep for a day in a box if you have time.)
Making Mugi Urushi / Urushi glue
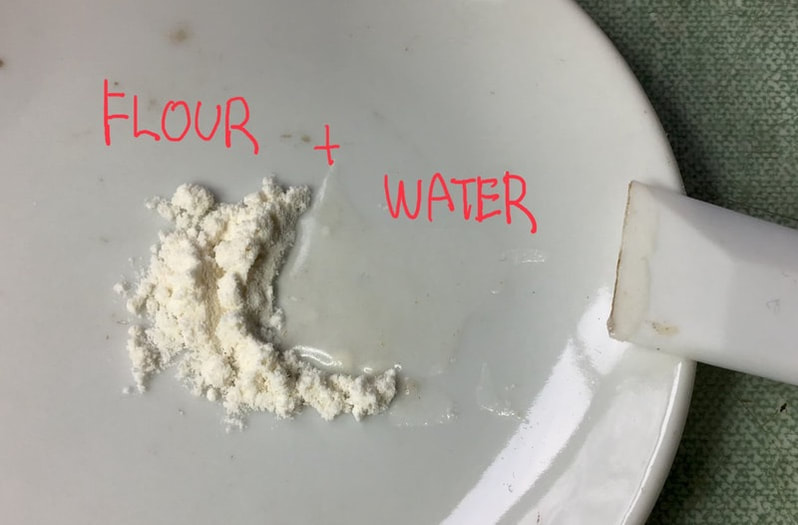
Mix flour (or rice powder: flour=4:1) and water (or rice glue) on the white plate till a bread dough like consistency is achieved.
Mix flour (or rice powder: flour=4:1) and water (or rice glue) on the white plate till a bread dough like consistency is achieved.
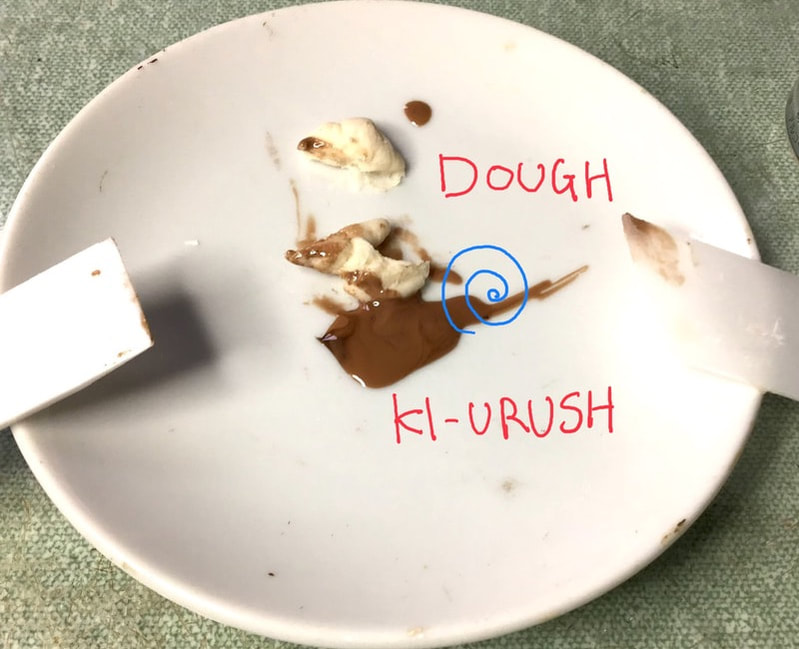
Mix Ki-urushi and the dough little by little till sticky, ensure this is mixed very well.
Proportion: Ki-urushi : Dough ≒1 : 1
Proportion: Ki-urushi : Dough ≒1 : 1
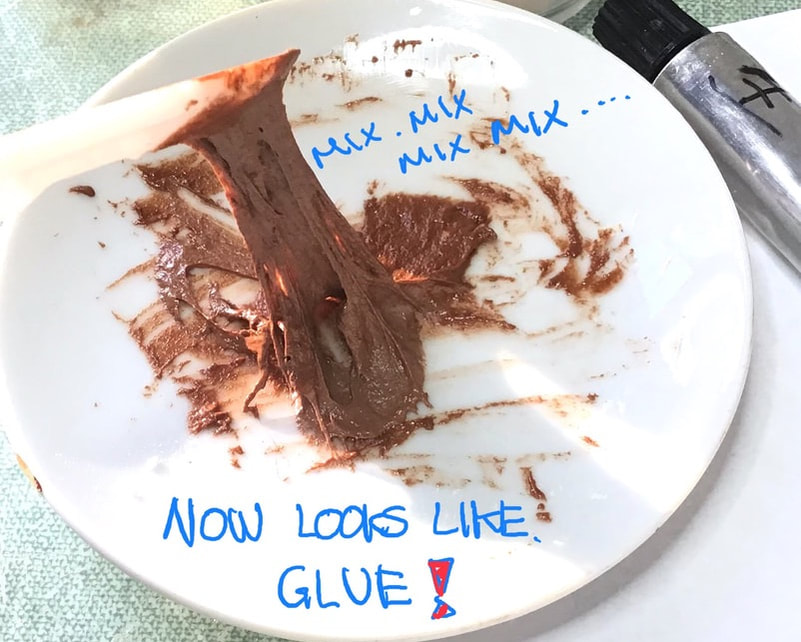
Mugi (wheat) Urushi, Done!
Application:
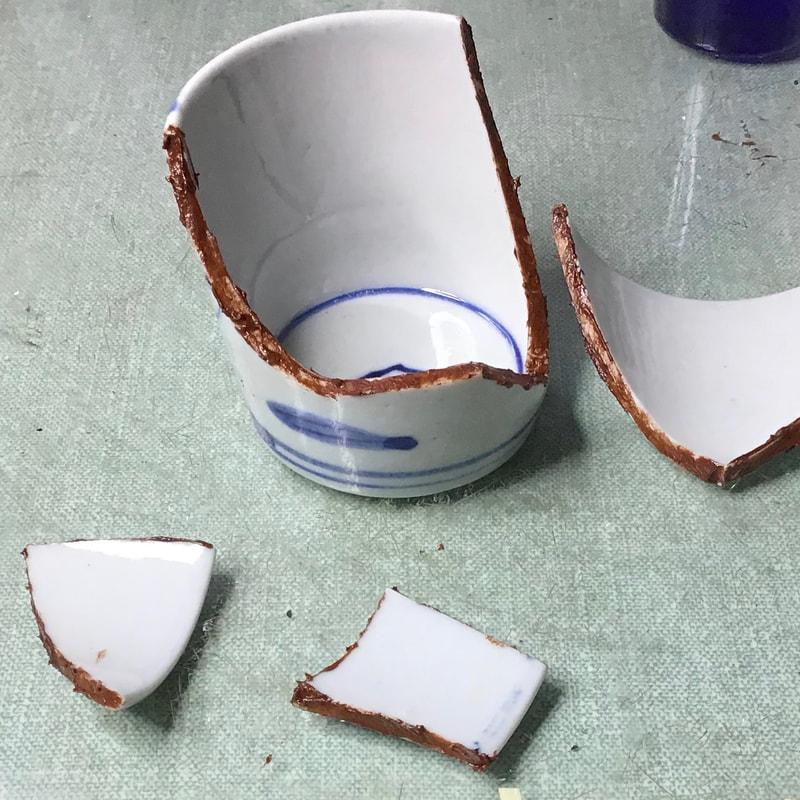
Using spatula or a cocktail stick, apply Mugi urushi thinly onto each section.
Leave for about half hour.
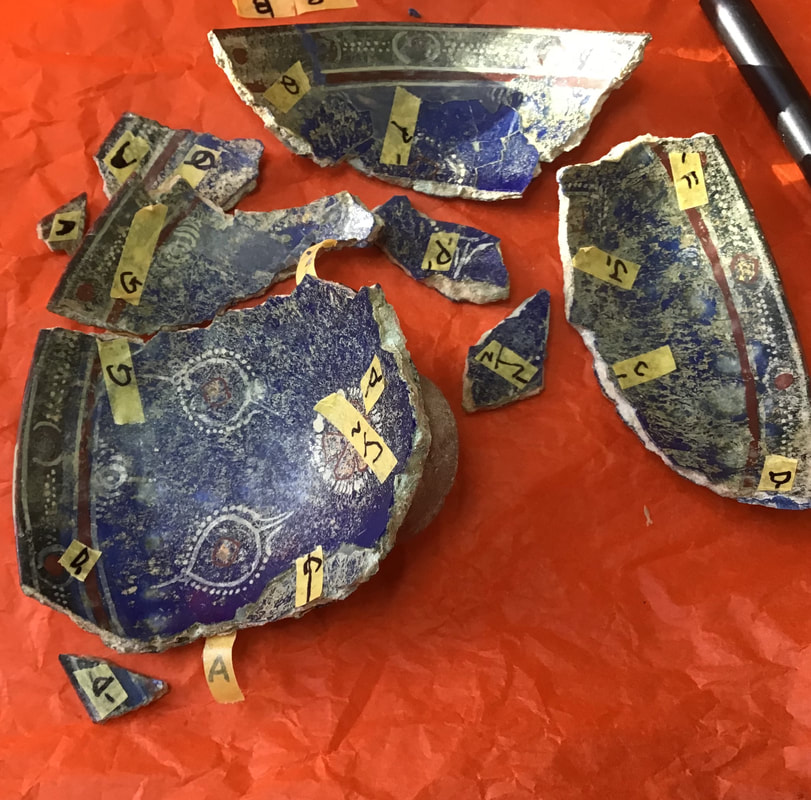
While waiting , cut masking tapes to 4cm lengths (longer if repairing a larger plate) and put aside.
Using spatula or a cocktail stick, apply Mugi urushi thinly onto each section.
Leave for about half hour.
While waiting , cut masking tapes to 4cm lengths (longer if repairing a larger plate) and put aside.
Join all pieces together. Make sure that all pieces are attached tightly, and avoid any gaps.
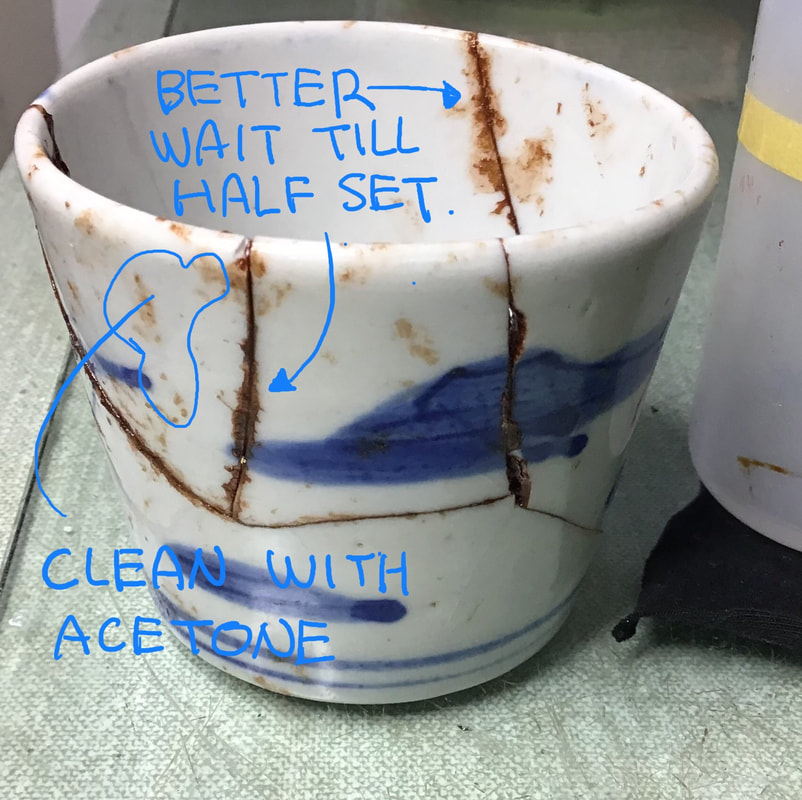
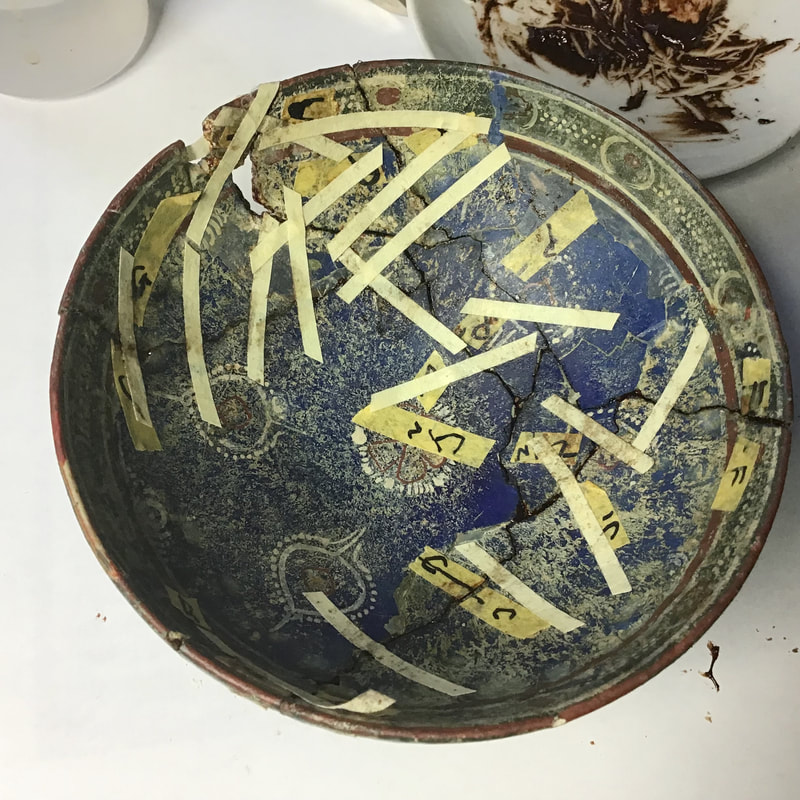
When the pieces have been joined, remove any excess urushi on the surface using cotton swabs with acetone. Support them with masking tape.
*If pieces are not firmly joined, apply masking tape first without cleaning. You can clean later within 24 hours.
When the pieces have been joined, remove any excess urushi on the surface using cotton swabs with acetone. Support them with masking tape.
*If pieces are not firmly joined, apply masking tape first without cleaning. You can clean later within 24 hours.
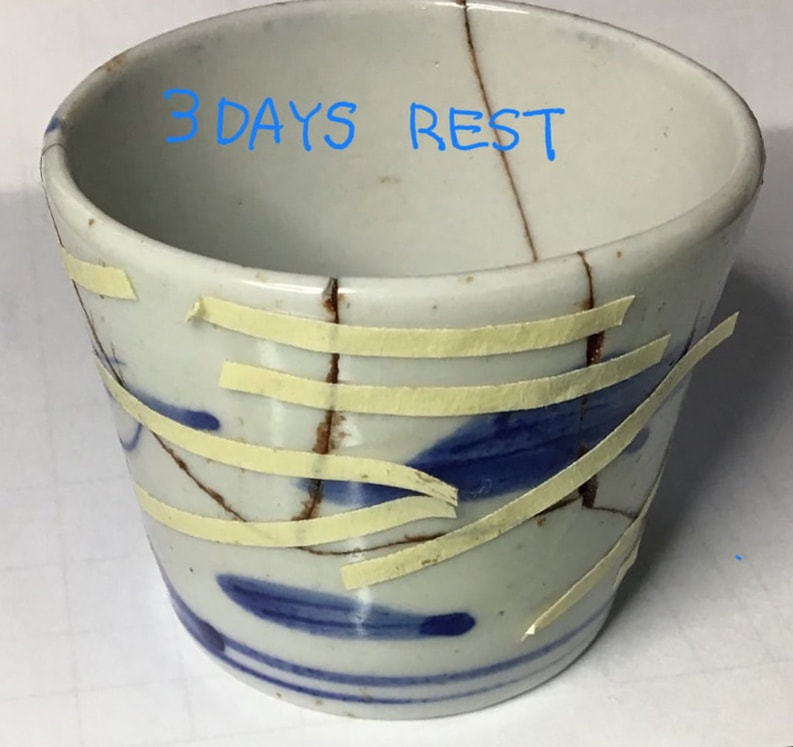
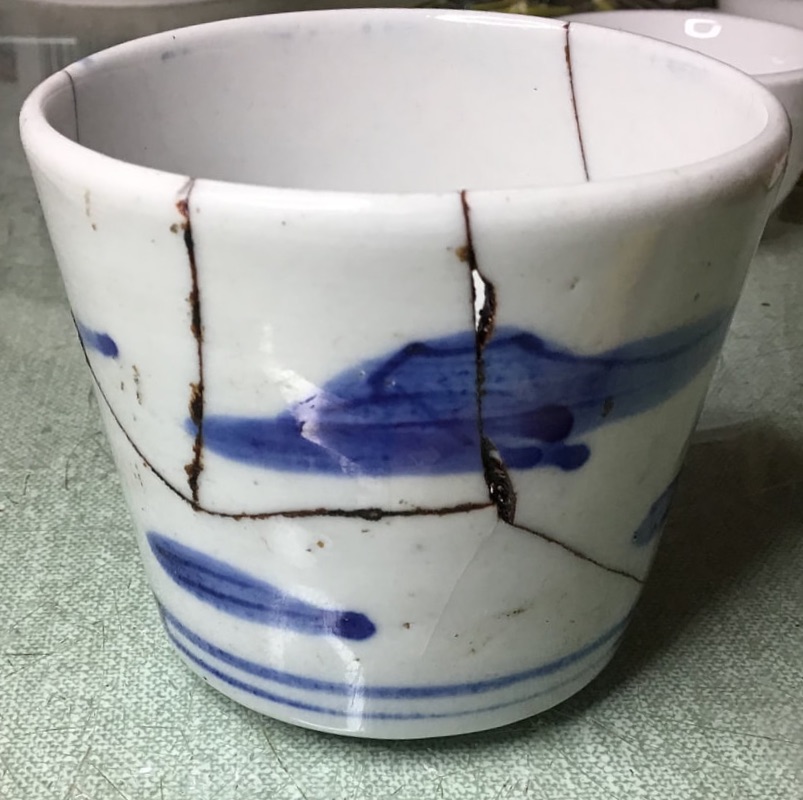
Keep in a box, and check it time to time to prevent pieces from moving due to gravity and of the weight of the repaired piece.
Keep in a box for three days till Mugi Urushi hardens.
Keep in a box for three days till Mugi Urushi hardens.
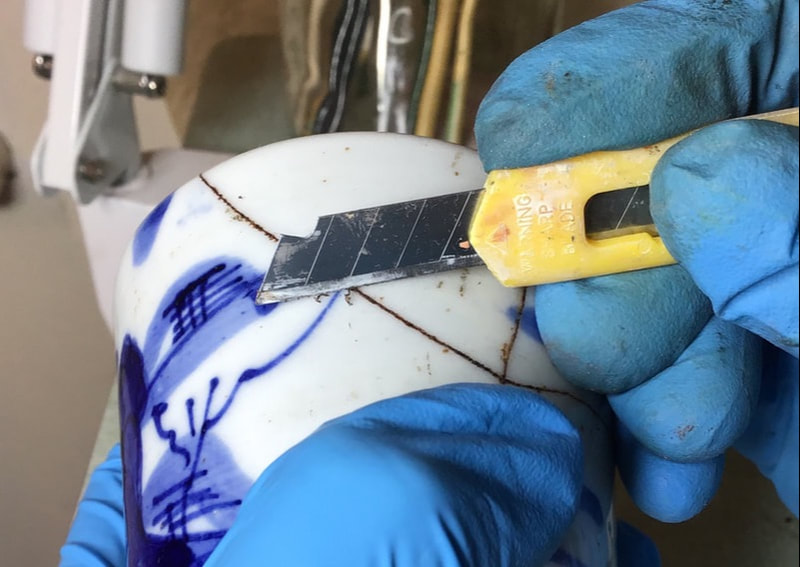
Remove masking tape, and clean excess Mugi urushi, scrape it off with a cutting knife and clean with acetone.
No need to clean Mugi Urushi in gaps and holes. When it sets, move on Kokuso (urushi putty).
|
|
Mugi urushi takes time to set. If you are repairing complicated item, this long setting time allows you to adjust the gaps.